Guide-Configuring a Unified Data Connector
Guide - Configuring a Unified Data Connector
| Version | Data | Author | Description |
|---|---|---|---|
| 1.0 | 2026年7月10日 | @倪锦鹏 | Init Document |
Introduction
This guide provides comprehensive instructions on configuring a Data Connector.
Perrequisites
The user must have an Admin role.
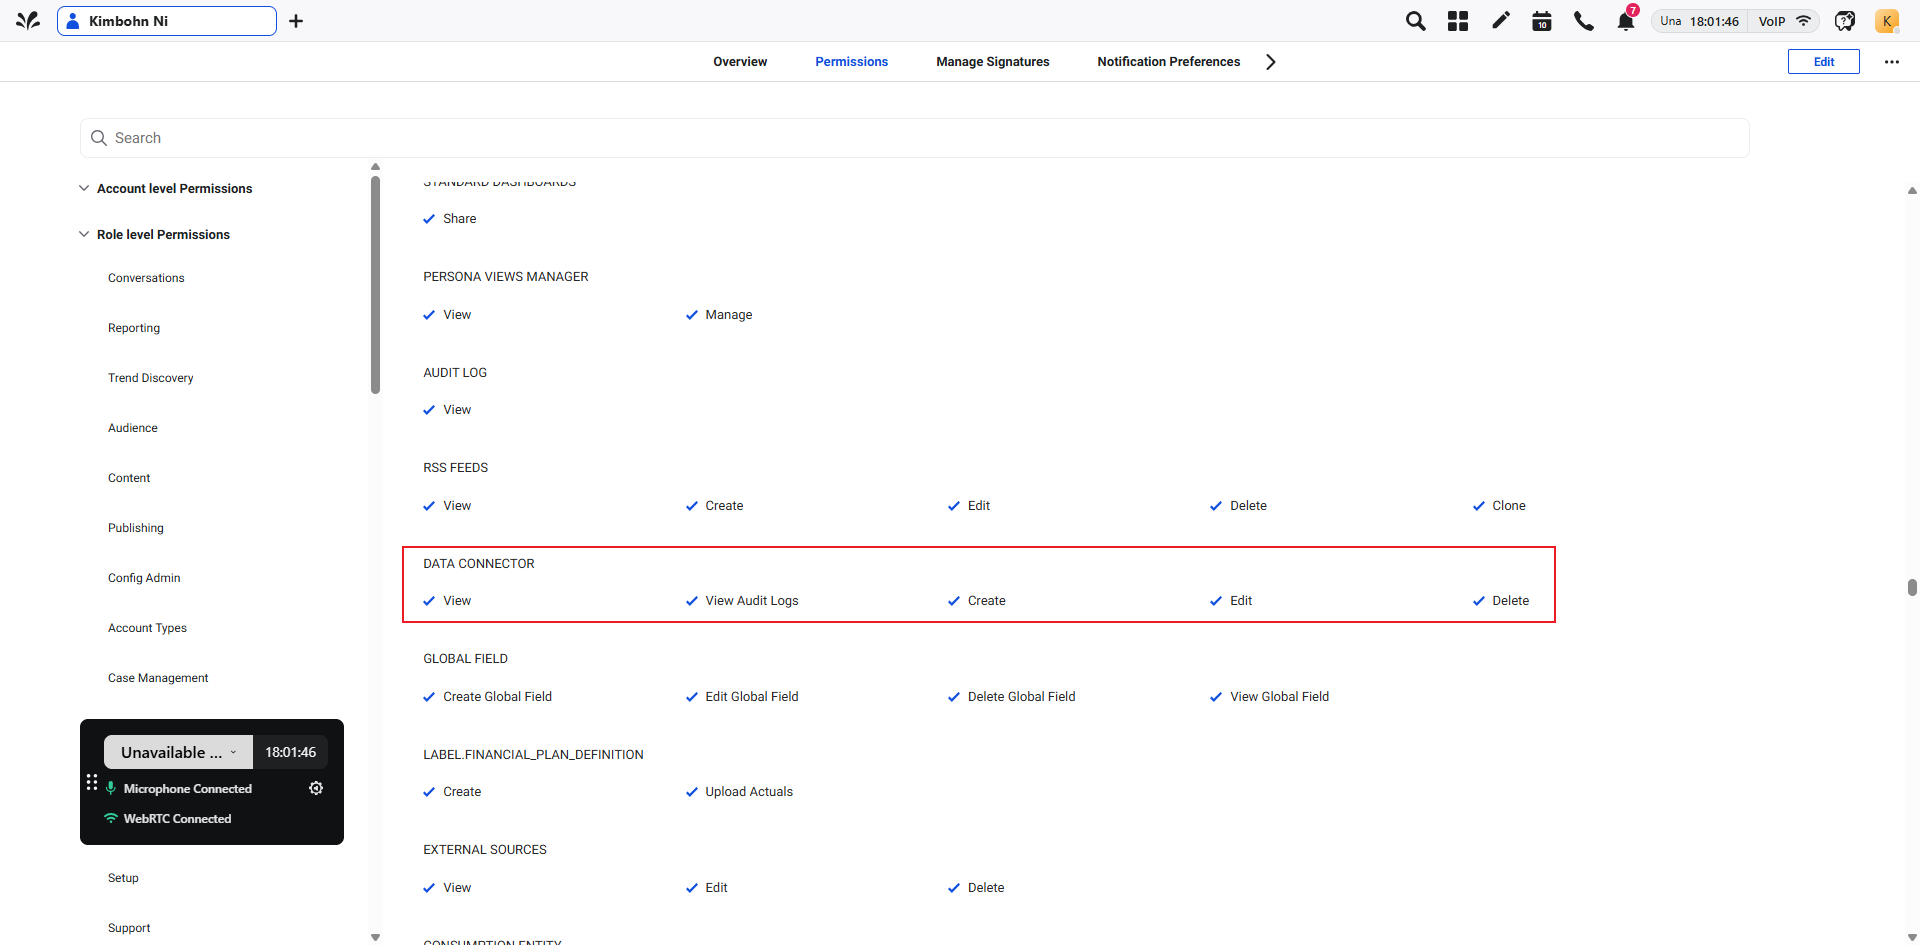
Ensure that the following permissions are provided to you to access the data connector before you start installing the Connector. The screenshot shows all relevant permissions that you require to access Data Connector.
Accessing the Unified Data Connector
You can access the Unified Data Connector using the following steps:
- From the launchpad, either use the Search box and type Unified Data Connector or navigate to Love and under **Migrate Your Data To/From Sprinklr, **click Unified Data Connector. The **Data Connectors **page appears.
On the Data Connectors page, you can view all the data connectors in Sprinklr that are either enabled or disabled.
- Click +**Install Connector **to install a connector.
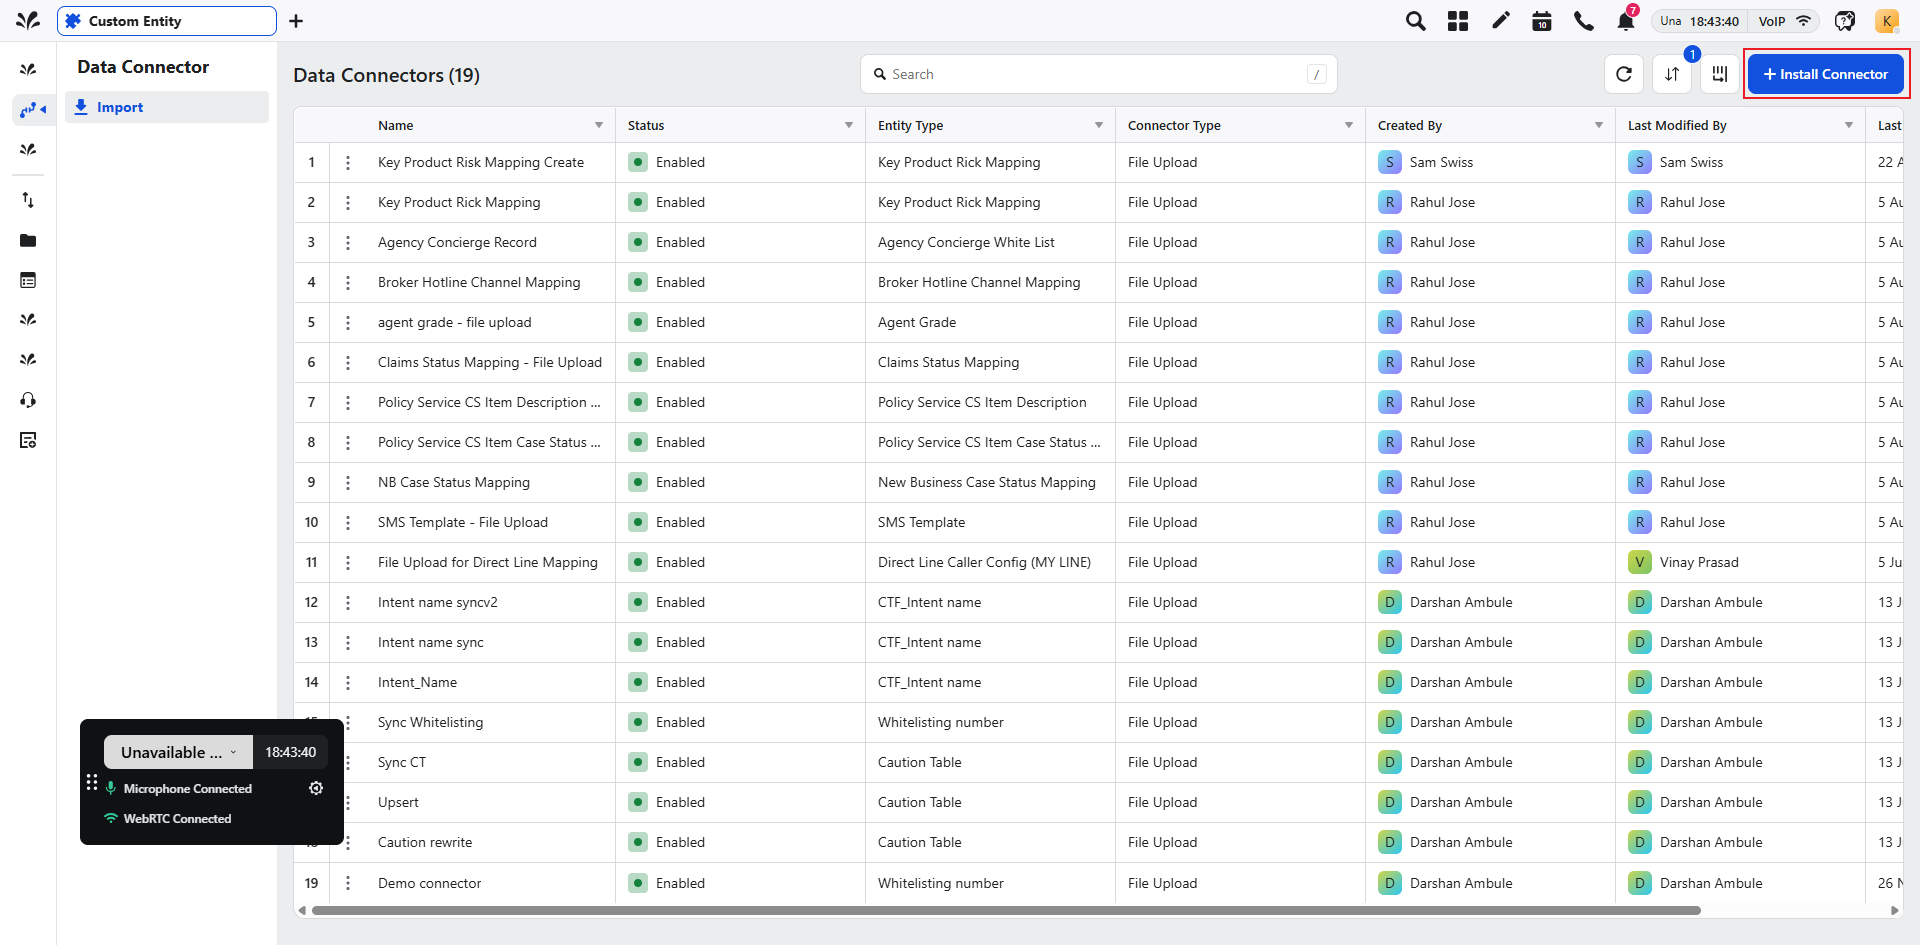
- Click on the three dots corresponding to any existing connector and to perform various actions on the connector such as edit, delete, run, activate, or view activity.
Configuring a Data Connector
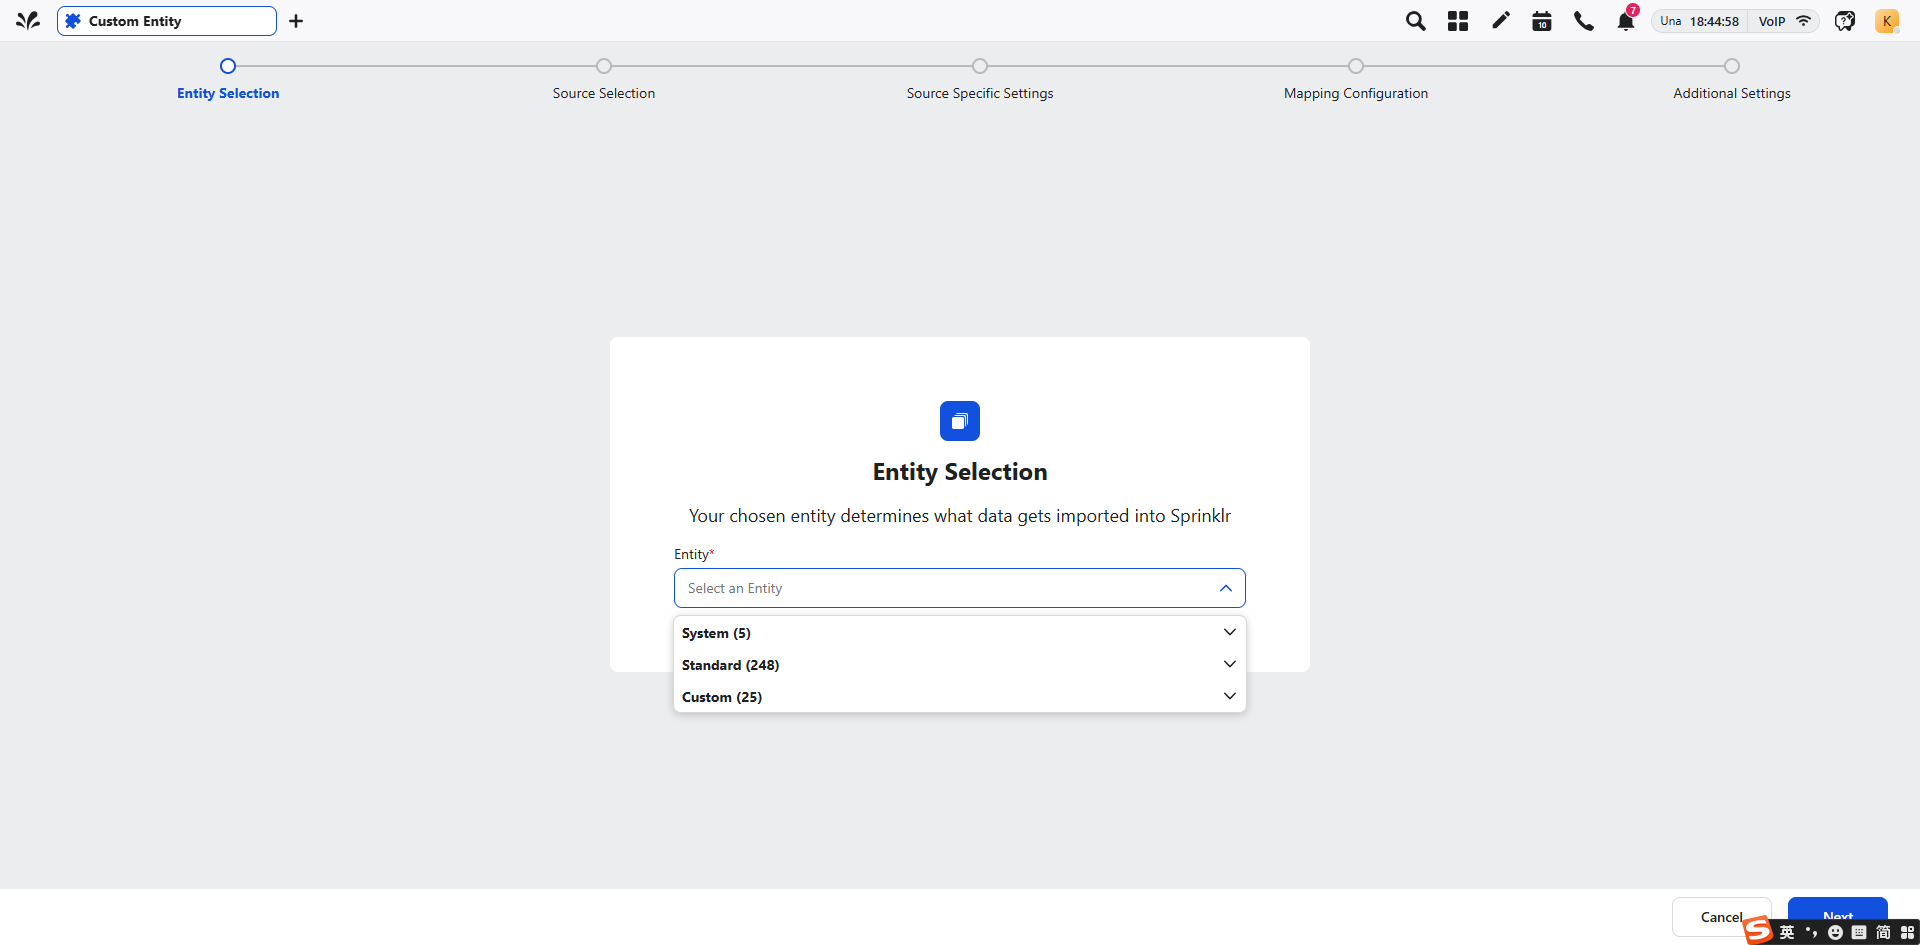
After clicking on +Install Connector, you can view the Entity Selection screen which is a static screen. You can begin by selecting the appropriate entity type that you want to import on the Sprinklr platform. There are three entity types supported in Sprinklr:
System: Entities such as Cases, Tasks, Accounts, and Users, are built into the system to facilitate core business functions and streamline operations for a customer. By leveraging these system entities, you can efficiently track and manage customer interactions, collaborate on tasks, and analyze performance metrics without the need for extensive configuration.
**Standard: **These are commonly used data structures that can be integrated into Sprinklr. While the specific standard entities available are not detailed in the provided sources, they typically include entities like Contacts, Accounts, and Leads, which are standard across many CRM and data management platforms.
**Custom: These **allows you to create data objects that cater specifically to your unique workflows or specialized needs. This ensures that the platform can adapt to your specific requirements, offering greater control over data management and interaction.
Entity Specific Settings
In the Entity Specific Settings screen, you can select settings specific to the Entity chosen in the Entity Selection screen. For example, you can configure the integration settings such as data synchronization methods and entity-specific details from the Entity Specific Settings screen.
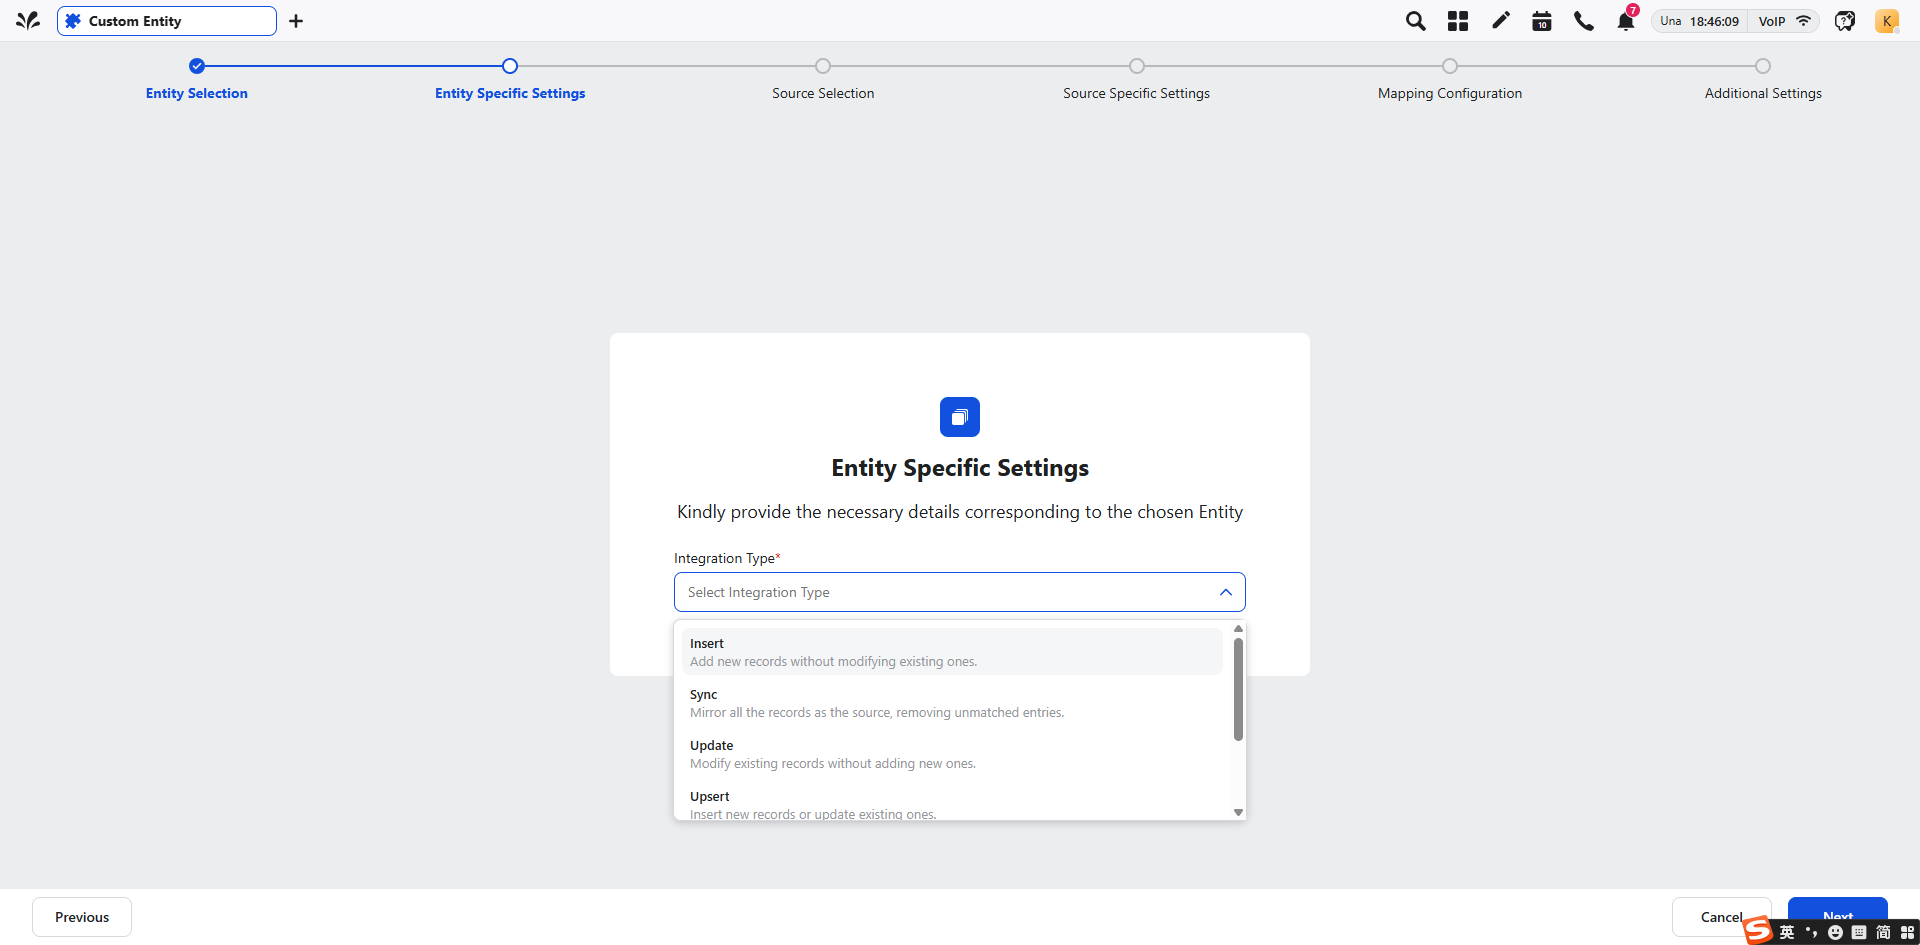
Source Selection
After defining the entities that you want to import on to your platform, you are required to define the entity source from where you will fetch the entity. Select File Upload.
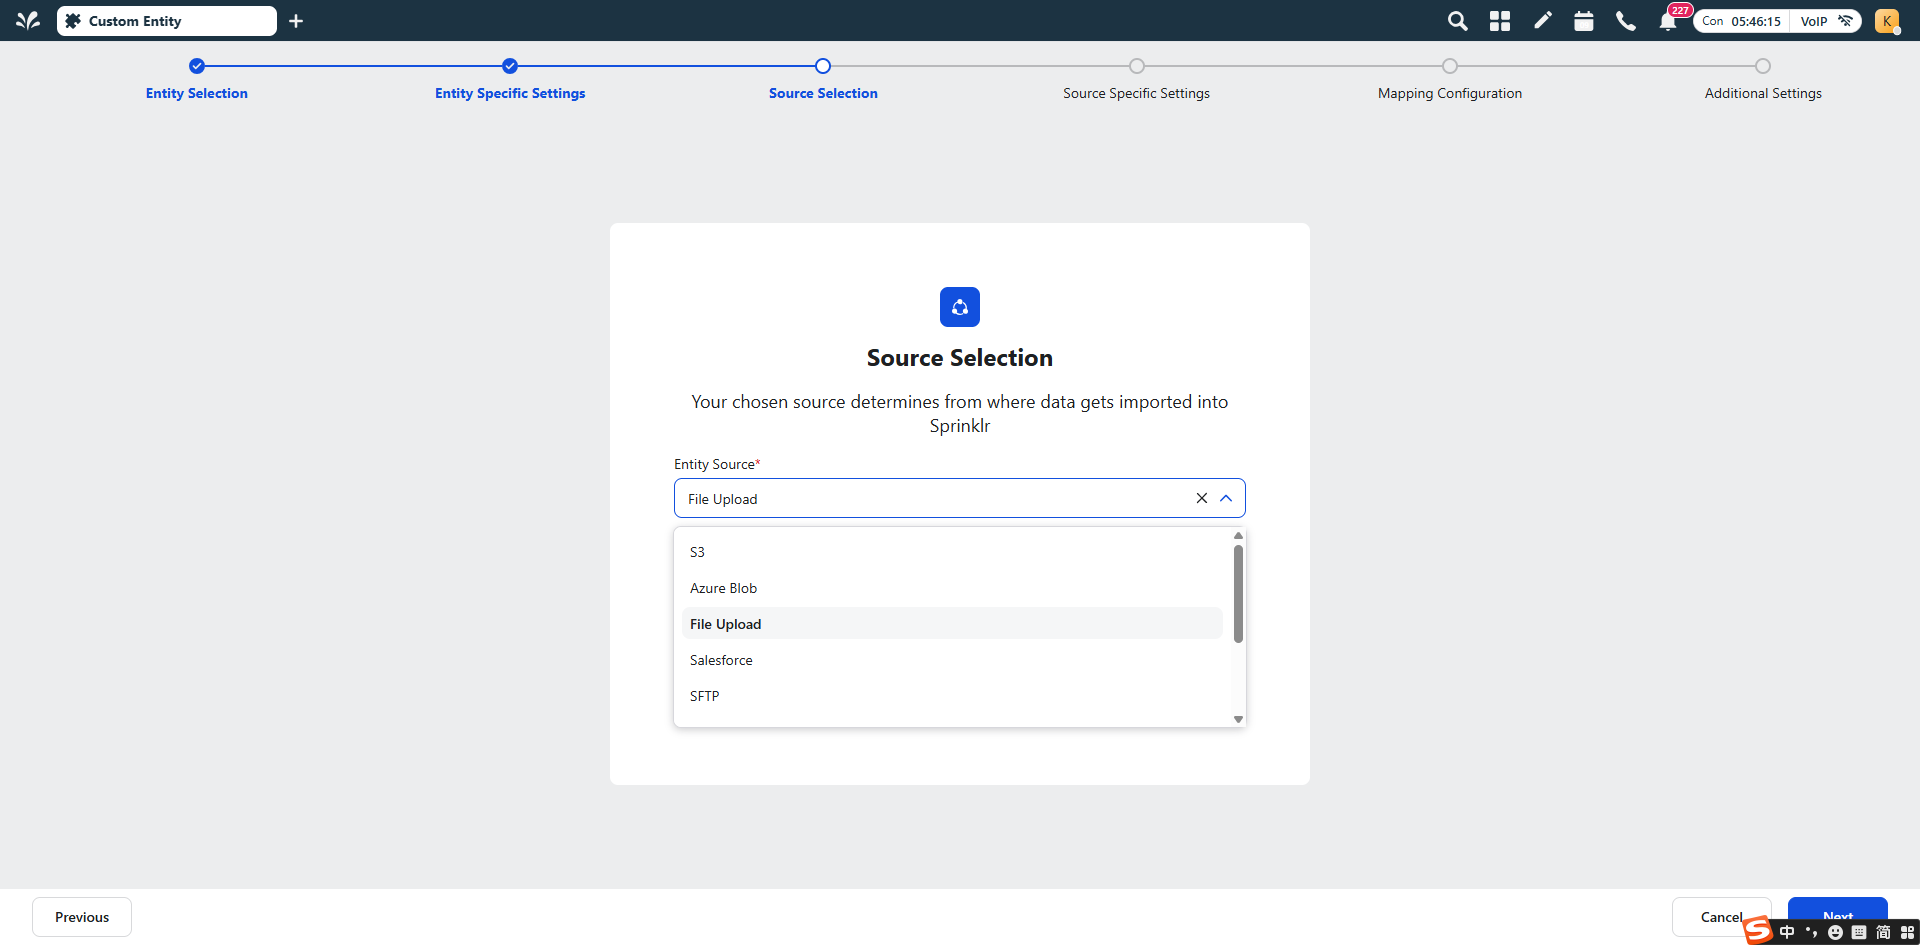
Source Specific Settings
Provide the necessary details corresponding to the chosen data Source, upload sample file
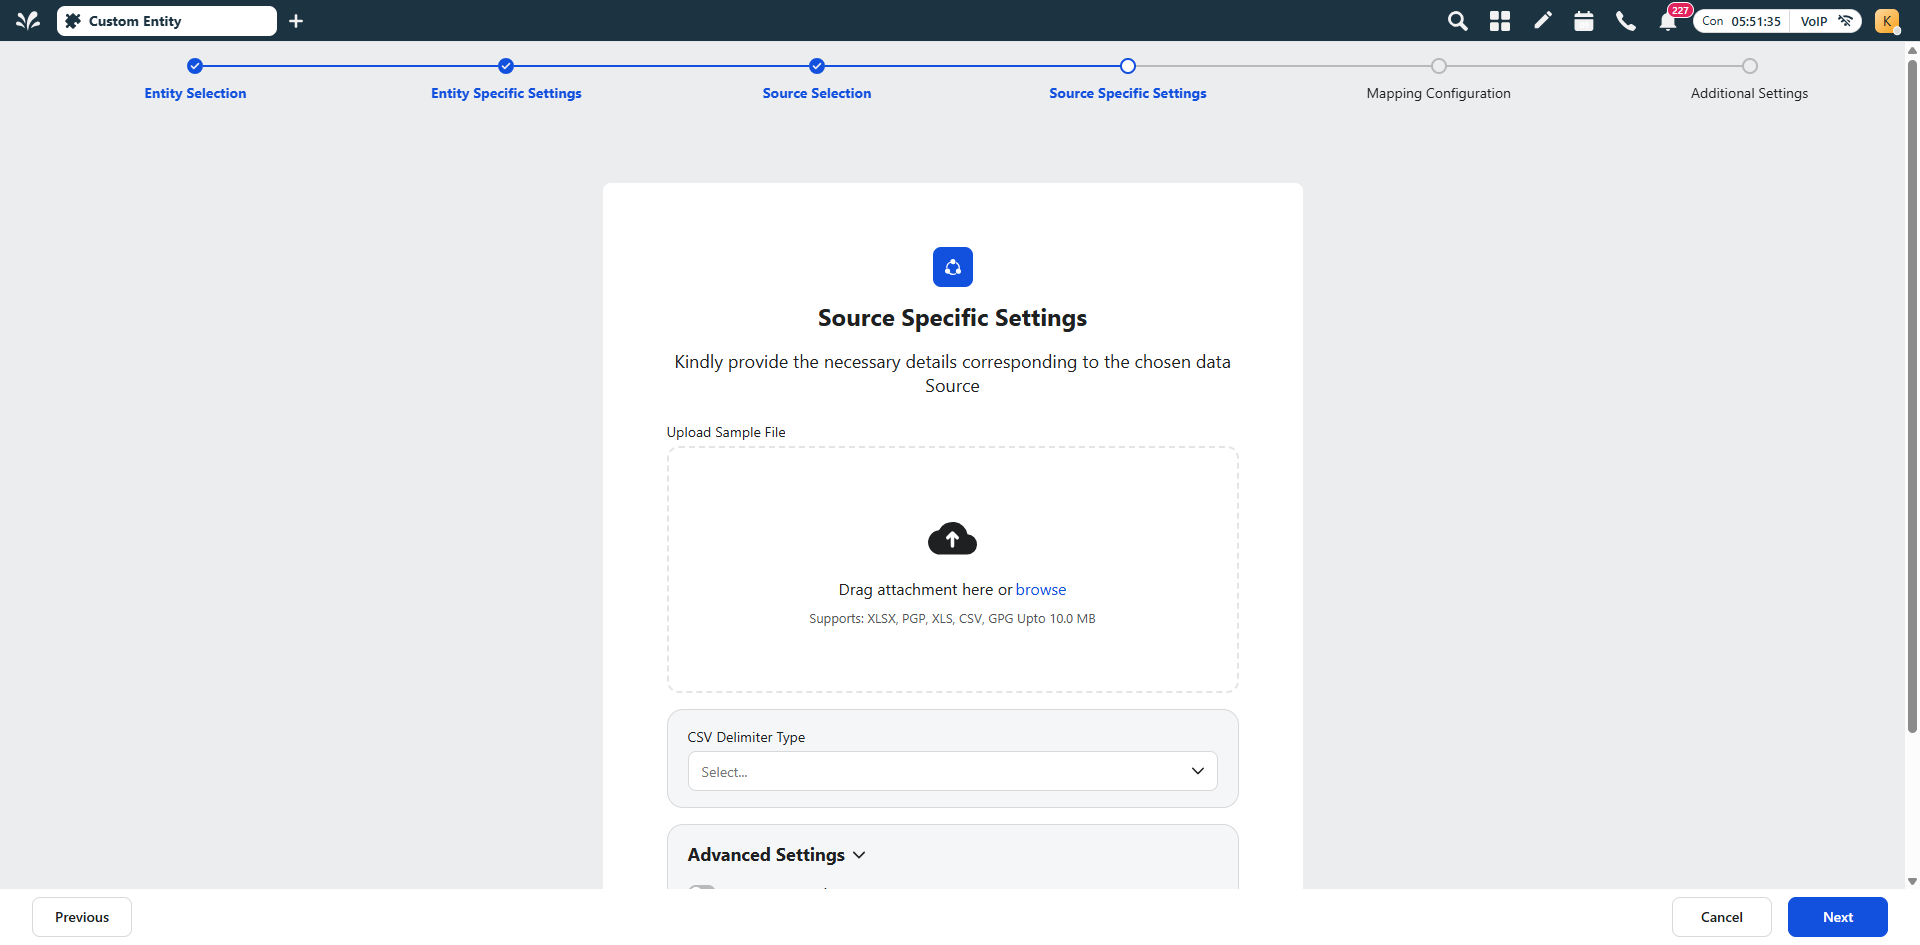
Mapping Configuration
Once data sources are configured, proceed to map data columns to corresponding fields in Sprinklr, applying validation rules like regex patterns for data consistency.
Additional Settings
Finally, you can manage access permissions through share settings, specifying user groups and assigning permissions ranging from view-only access to full administrative control.
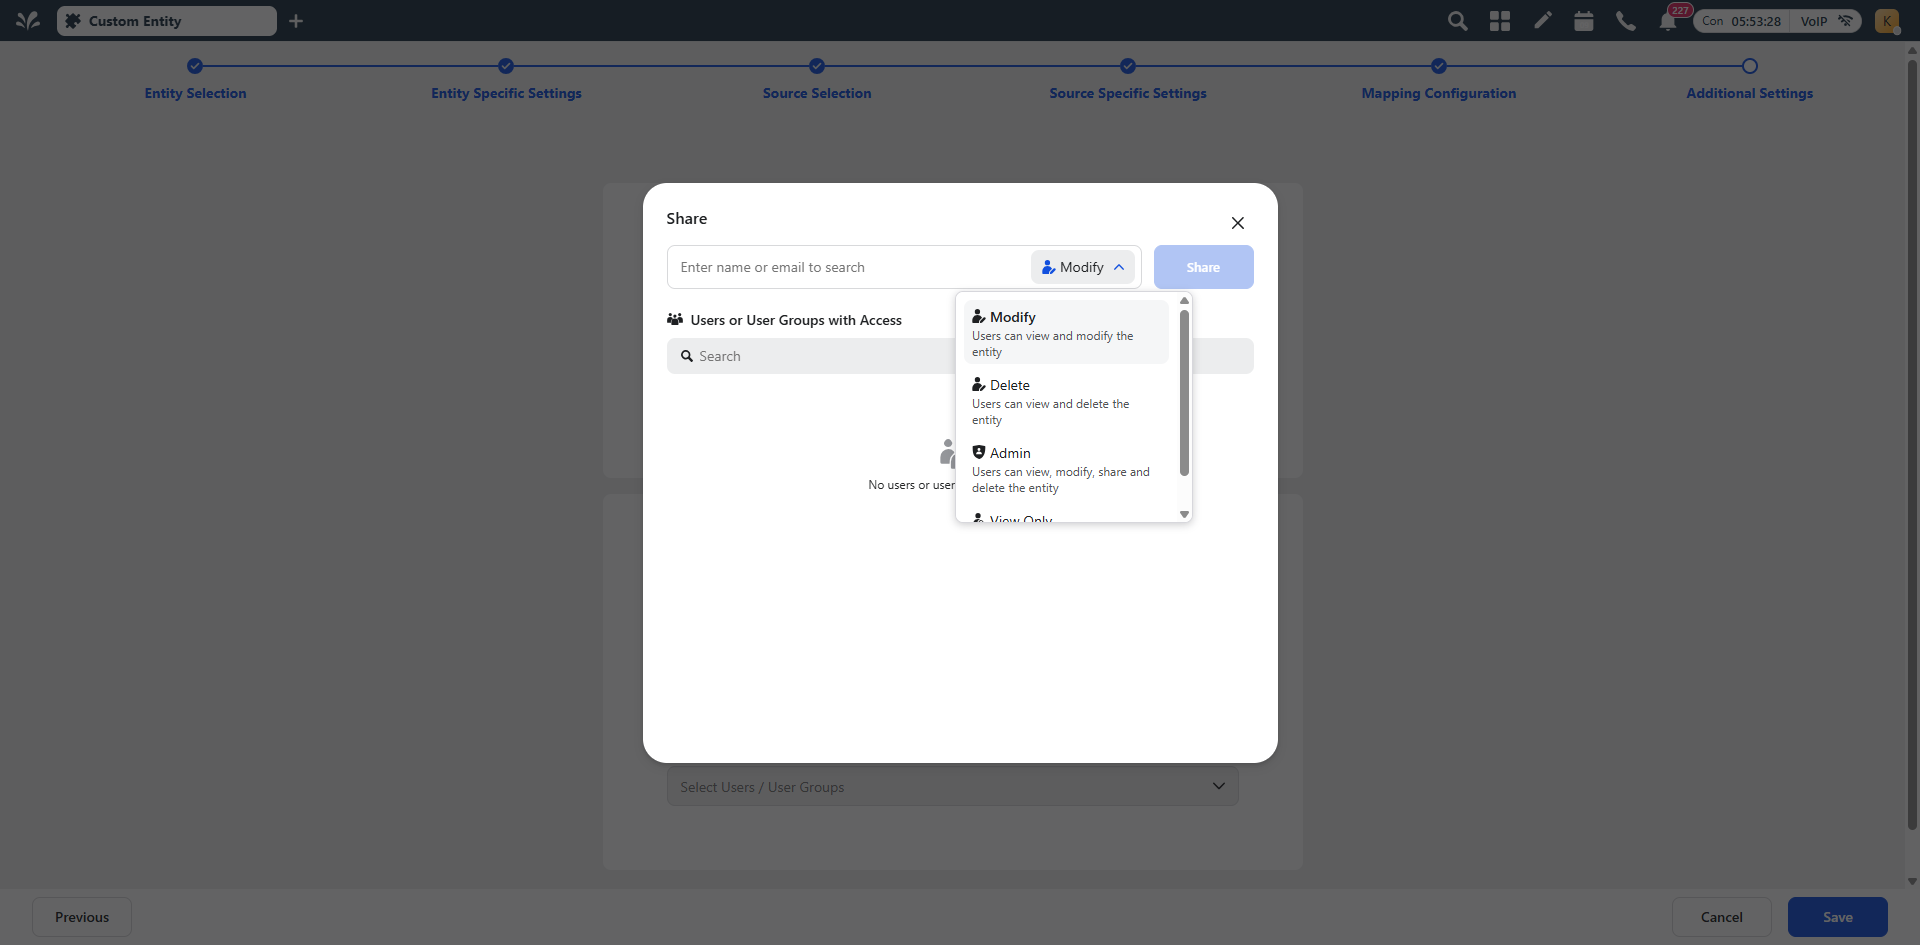
Share settings refer to the configurations or permissions that govern how data is shared or made accessible between systems, users, or roles during the mapping process. These settings ensure proper control over sensitive or critical data and define how specific fields are handled or exposed.
Notifications Settings
Notification Settings refer to the configuration of alerts or updates that notify users, teams, or systems about specific events, changes, or errors during the data mapping process. These settings help maintain visibility, monitor workflow progress, and address issues promptly.
You can email platform users to inform them of a successful run of the Data Connector or to warn them of issues for non-recurring connectors like File Upload and SQL. People who can choose to get notifications regarding connection activity are the users who have a connector shared with them.